Friday, February 28, 2014

Updated: Bobbin Holder for Plastic Bobbins

Several months ago, I wrote a post about my spool & bobbin holder


It worked really well, except for one little thing. My machine requires plastic bobbins. Oops. I didn't realize, as a new quilter, that it mattered, until I took a class and learned that metal bobbins can ruin my machine. Yikes.

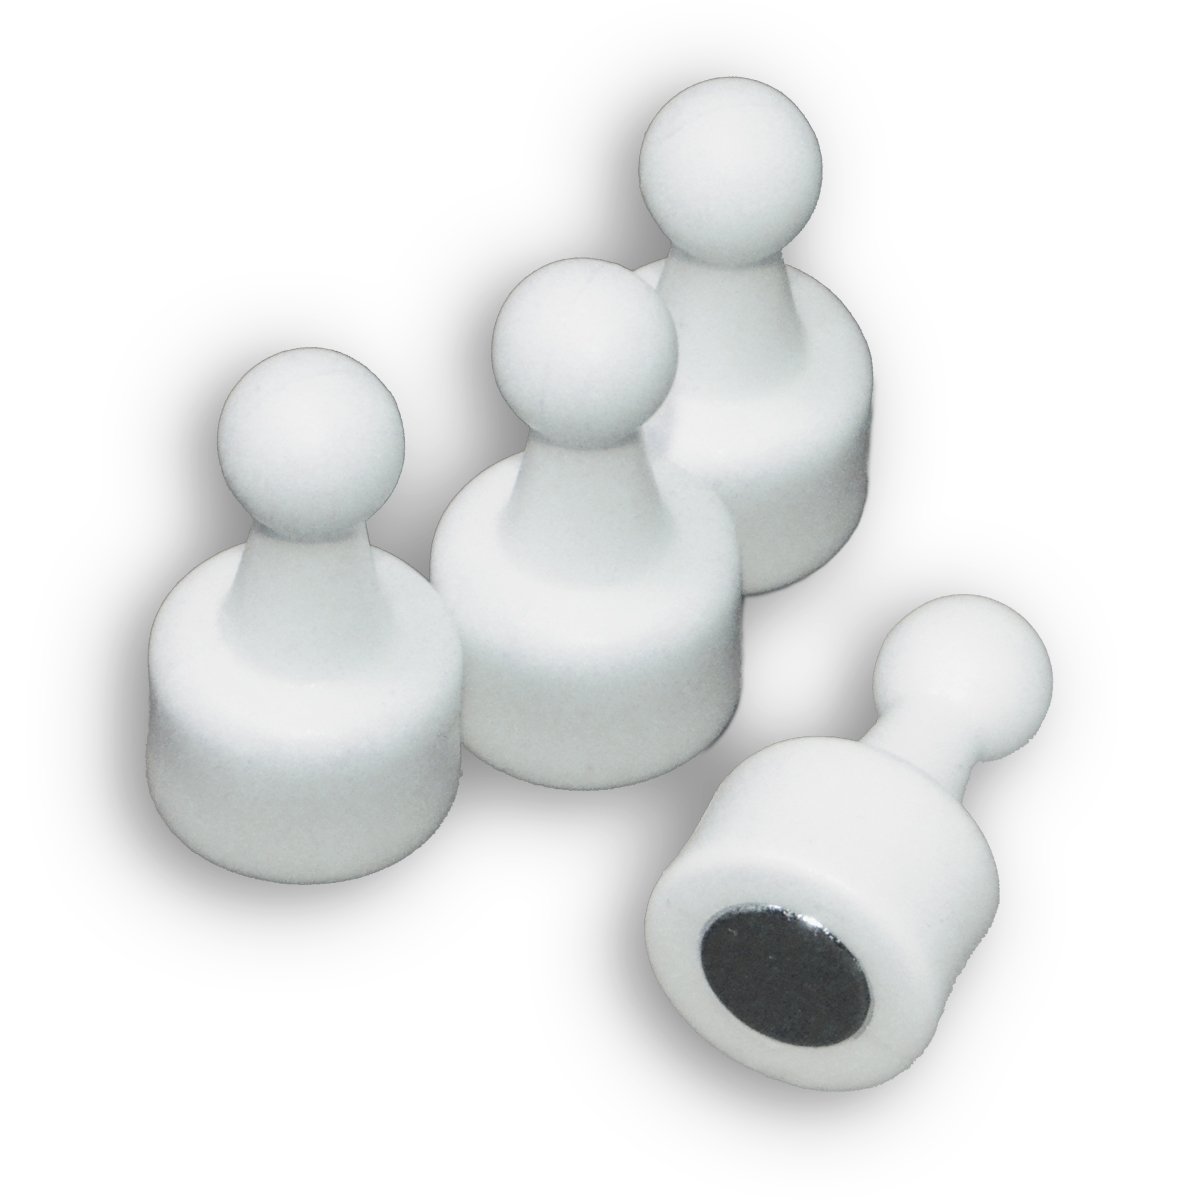
So I went back to the drawing board. I still really liked my original design, but of course, plastic won't adhere to magnets. Unless I use cute little magnets like this.

CMS NeoPin Magnetic Push Pins

I ordered the magnets for another project (post to come) and realized they solved the problem I had with my holder.


I'm so happy I can keep using my holder! 

Wednesday, February 26, 2014

Expedit Ideas for Every Room


Like many Ikea fans, I was shocked to hear that the iconic Swedish retailer was discontinuing the uber-popular Expedit. Fortunately, all is not lost. The Expedit 2.0, aka Kallax will roll out in April.

Expedit on the left, Kallax on the right.
The two systems are very similar. The main differences are that the Kallax does away with the distinctive chunky border, has slightly rounder corners, and is supposed to be more scratch resistant. The interior size of the cubes are the same and all the boxes and accessories for the Expedit will still fit the Kallax.

The nice thing about the change is that it that the slightly smaller trim will significantly cut down on the number of trees Ikea uses produces the units. This tree-hugger loves that. But my slighly-OCD tendencies drove me to Ikea this weekend to buy the last two Expedits I wanted for my craft room. I'm sure we will purchase a few Kallaxes (Kallaxi?) in the future, but at least my craft room closet will have Expedits to match my Expedit craft table.


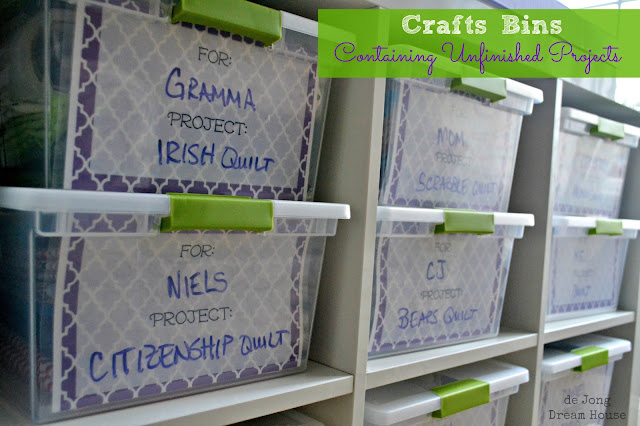
I love how perfectly the Sterilite bins fit in the Expedits.


Here's a quick peek at my craft room closet organization in progress.


I've started a Pinterest board with some of my favorite Expedit uses and hacks. Take a look at some of my favorite ideas for using Ikea Expedits around the house.

Nursery
I wish we would have thought of using an Expedit in our son's room when he was a baby. What a creative, versatile changing table!

Expedit changing table via Little Lovely
Child's Bedroom
I could see our son loving this Expedit storage bed. What a great way to store all his books!

IKEA Expedit storage bed
Expedit Storage Bed via Meredith at Ikea Hackers
Any Bedroom

We actually have Ikea Hopen drawers for nightstands in our master bedroom, but I love the idea of using the Expedits and saving a lot of money!

Affordable Night Stands via Free Sylin Beth (Update: the site has since been deactivated)
Closet

Make the most of your closets with an Expedit and a few bars. 
DIY Custom Closet via I Heart Organizing
The same idea works in a walk in closet, too. 

Kevin Wilson via Ikea Hackers
Kitchen

Make your own kitchen island or bar with an Expedit and a table top of your choice. 

Ikea Expedit Kitchen Island
Kitchen island via Decorating Insanity
This command center is a creative way to make a corner work for you. 

Family Command Center via Iron & Twine
Pantry

I just love the look of this walk-in pantry, especially how the Expedit makes a shelf.  I would use that for my appliances.

Pantry via Mel 'N' Rob's Knockdown Rebuild
Speaking of appliances, how cute is this appliance storage idea?

Cubby Organization
Appliance storage via BHG
Dining Room

Add legs to an Expedit for a simple home bar or sideboard

Ikea Expedit as Home Bar-use the 4 not the 8 and add a wine fridge and floating shelves above...and the black/brown color
Home bar via Live Creating Yourself

Living Room

Technically, I don't think this example uses Expedits, but I have my eye on a variation of this idea in our basement living area. Instead of books, we'll use the shelves for DVDs and board games.

01sofa4-28-09.jpg
Sofas with Shelving via Apartment Therapy
Bathroom

Did you know you could use an Expedit as a linen closet? Why, yes you can!

Expedit linen closet by Live Creating Yourself
Foyer/Mudroom

Expedits have long been uses as room dividers, but I this rendition is really creative. 

Expedit as foyer via Apartment Therapy
If you have a little more room, Expedits can create an organized mudroom.

Photo credit: IKEA catalog
Laundry Room

Find more storage room in your laundry room by hanging an Expedit above the counter.

Achieving Creative Order: Laundry Room--Before and After
Expedit laundry shelves from Achieving Creative Order
Here's another way to organize the laundry area. I actually have this idea pinned for our son's book nook when we are ready to turn it into a desk area.

IHeart Organizing: Reader Space: Creative & Compact Laundry Storage
Laundry Room Revamp by Six 2 Eleven
Exercise Room

Expedit shelf in the exercise room
Expedit TV stand for a treadmill via I Heart Organizing (Note: the original post with this photo seems to have been taken down)

Craft Room/Office

Of course, I'm partial to my craft room, but lots of people have found creative way to use Expedits in their work spaces. I just love this desk.

Rambling Renovators: Getting Organized #office #ikea  Home office for 2...nice set up for one wall of your craft room with work table in center...
Desk by Rambling Renovators
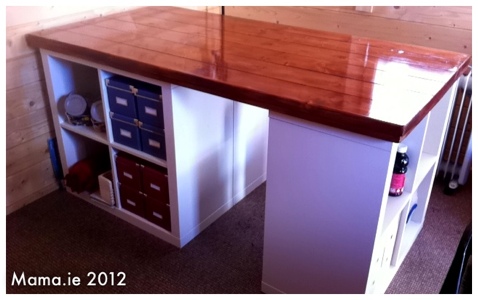
And here's a smaller version of my craft table with space for a chair. 

20120628-224121.jpg
Craft table via Mama.ie
Playroom

This is one of the first images I ever pinned on Pinterest. I love this idea for a play area. And if you don't have an Ikea in your area, you're in luck, because these shelves were made at home, courtesy of Ana White's tutorial

2x4 Console Cubby Shelves
Console height cubbies by Ana White
My little guy prefers dogs to dolls, but this Expedit doll house is adorable.

Dollhouse by Land of Nod
Do you share my love of Expedit? How do you use Expedits in your home?


Thursday, February 20, 2014

DIY Quilt Display

Here's a first peek at the quilt I made for Niels to celebrate his American citizenship. Blog post to come. 
I'm so excited about my latest project! As this winter has gone on and on and on, I've been having a hard time finding a good way to photograph my finished quilts. Even if I could get outside, we don't have a clothesline, fence, or deck on which to hang my finished quilts. 

Inside, most of my walls are filled with gallery walls, like our son's growing up gallery right outside my craft room:


I was sitting in my craft room the other day pondering my dilemma and wishing a had a big blank wall in my craft room because it has such great natural light. The door to my closet was open and I had my ah-ha moment.

This picture was taken months ago when I first converted our spare room into my craft room. It was much more crowded and messy when I had my big idea.
I've been wanting to get rid of the pole and shelf in the closet because I want to use the Expedit shelving instead. But, because I'm in the middle of a really big project I will be telling you about next month, we hadn't made time to do it yet. 

So I called Niels and asked if we could work on a project when he got home. When he said yes, I emptied out the closet. 


This is the rod and bracket system our builder put in. You can find similar ones at the big box stores.


I am so blessed to have a hubby willing to help with my projects. 


 It took awhile to figure out how to remove the brackets because the screws were hidden. But my hubby is smart and figured it out.


It didn't take long at all to move the shelf up above the closet door.


Other than buying a new bit for Niels' drill, our only cost was a pack of ring clips.


Ready to buy some more Expedits before they are no longer available. (NOOOOOO!!!!)


I think we will have an Ikea run this weekend to buy two more 2x2 Expedits.


In the meantime, this will have to do. (By the way, you can get a peek at how I organize my rulers on the inside of the door to the right). 


Fortunately, I can close the door...and put up a quilt!!!

This is a queen-size quilt top I just finished. With the project mess and my big craft table,  I couldn't quite see the whole thing, but most quilts I make are not nearly this big.


The clips work perfectly.


Most quilts I made are the size of my very first quilt.


This is the other queen-size quilt I just finished. I can get the whole quilt if I stand to the side. 


The shelf makes a nice place for bolts of backing fabric and batting.


Linked to:


Sunday, February 16, 2014

Quilt #10: Michele's Kick Cancer Quilt

Michele's Kick Cancer Quilt

I'm typing up this post about my 10th quilt while on a break from sewing my 21st quilt. I have loved every quilt I've made because I've made them for people or causes important to me, but this one is one of my favorites.

When my friend Michele was diagnosed with breast cancer, I knew I wanted to make her a "kick cancer" quilt to keep her cozy in the days ahead.

I "sketched" out my idea on PowerPoint.


I had fun picking out fabrics for this quilt. I ordered the two small print pink ribbon fabrics online.


I learn something new (or two) with every quilt. This time I learned about chain piecing. Wow! It sure saves a lot of time to sew all the pieces in a row (in a chain!) without snipping the threads in between each one. Saves thread, too!


Pretty chain of squares.


Snipped and stacked.


I've been spending a lot of quality time with my iron lately.


Another lesson I learned. How to make half square triangles two at a time. First I drew a line on the lighter colored square, in this case, the white square.


Then I sewed 1/4" on either side of the line. 


I cut on the original line I drew (or use my ruler to cut a straight line between the corners of the squares).


And voila! Pretty half square triangles ready to trim!


First block ready to sew together.


The piecing went together super fast.


I liked the way the light brought out the crosses on the white fabric. 


It took me a few tries to get the heart in the middle correct. I'm sure there was an easier way, and I'll figure it out eventually.


All the blocks pieced together.


I added a simple white border to finish it off. 


Pinned and ready to quilt.


Quilting is not my favorite part of the process (read, I need a lot more practice!), but I had fun with this one echoing the crosses, diamonds, and heart.


Quilted heart.


Quilted cross.


Quilted diamond.


I really liked the pattern that was created by the crossed paths.


For the binding, I used some cute pink and gray fabric from my stash.


I may have finally figured out how to machine stitch the binding without one stitch weaving all over the place.


Bound and labeled!


I also made a matching pillowcase to spruce up her hospital bed.


D gave the quilt a thumps up for coziness!


And Michele liked it, too!


Linked to:
Crystal & Co Fluster BusterI Put A Bird On It * Just Us FourKiddie Foodies * Mums Make Lists*  My Life of Travels and Adventures * Practically Functional  * Romance on a Dime *  Sew Can Do * Sew Many Ways * Sparkles & A Stove * Tatertots & Jello  * This Silly Girl's Life * Val's Quilting Studio  * Will Cook For Smiles
Related Posts Plugin for WordPress, Blogger...